Some children, especially those with difficulties when transitioning, benefit from a picture schedule. Seeing what their day will look like and knowing what is coming up will make transitions easier. It’s also helpful for children who are waiting for something later in the day. My son’s Developmental Therapist suggested that I make one for him.
When I was a preschool teacher I had a picture schedule up on the chalkboard that showed our day. Since every day followed a similar schedule and we were almost always in one room this worked for my classroom. As a parent that method would not work for me since our schedule varies day to day and we don’t spend all day in the same room. I wanted a daily schedule that could travel with us from downstairs to upstairs to the mall and to the Doctor. I envisioned something small that could fit in Jacob’s backpack or my purse that would show Jacob what we were doing next. I was also hoping it would stop the questions about when Daddy was coming home since I could show him what we had to do before Daddy was going to come home.
I headed to Hobby Lobby with a general idea of what I wanted to make and after wandering down the aisles I settled on making a picture schedule using a small, hard covered scrapbook. If you want more ideas of things you can use to make a picture schedule check out the story of my shopping trip.
***
Items Needed:
-Pictures
-Small Scrapbook
-Cardstock
-Velcro
-Scissors
-Markers
-Contact Paper
Directions:

1. Gather pictures of your child doing everyday things. If you don't have ones you need make a game out of it by having them pretend to do things so you can take pictures.
***

Use the CraftBond Adhesive Squares to stick the pictures onto the cardstock.
***

Write a general description of what the picture is on the cardstock underneath the picture. Don't be too specific.
***

Cover the pictures with contact paper...be careful that it doesn't "bubble". You can smooth bubbles out with your finger. Cut the pictures out of cardstock.
***

Cut the velcro into small squares. Be sure to put the rough sided ones in a pile and the smooth sided ones in another.
***

Use the X-TREME School Glue Stick to stick the velcro on to the backs of the laminated cardstock. I suggest using the rough half of the velcro.
***

Adhere the other half of the velcro to the scrapbook pages using the E-XTREME School Glue Stick
***

Put the pictures in your scrapbook based on your day's schedule. Every morning you can take out pictures or add new ones depending on what you will be doing that day. Any extra pictures can be stored in a ziploc bag until you need them.
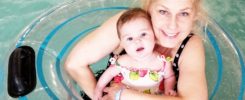
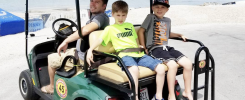
Suggested pictures to take/find include: Brush Your Teeth, Get Dressed, Go To The Store, Eat Breakfast/Lunch/Dinner/Snack, Take A Bath, Go To A Playdate, Go To School, Go To Church, Daddy Comes Home, Watch TV/Movie, Read Books, Take A Walk, Go To The Park, Play Outside, Bike Ride, Go To The Pool, Bake With Mommy, Clean Up, Art Project, Play A Game, Play With Your Toys, Bedtime, and any other ones that relate to something your child does on a daily or weekly basis.
(Disclosure: This project has been compensated as part of a craft recipe project using Elmer’s #collectivebias. All thoughts are my own.)
Find more projects on Twitter! Follow the hashtags: #gluenglitter #xtremeschoolglue